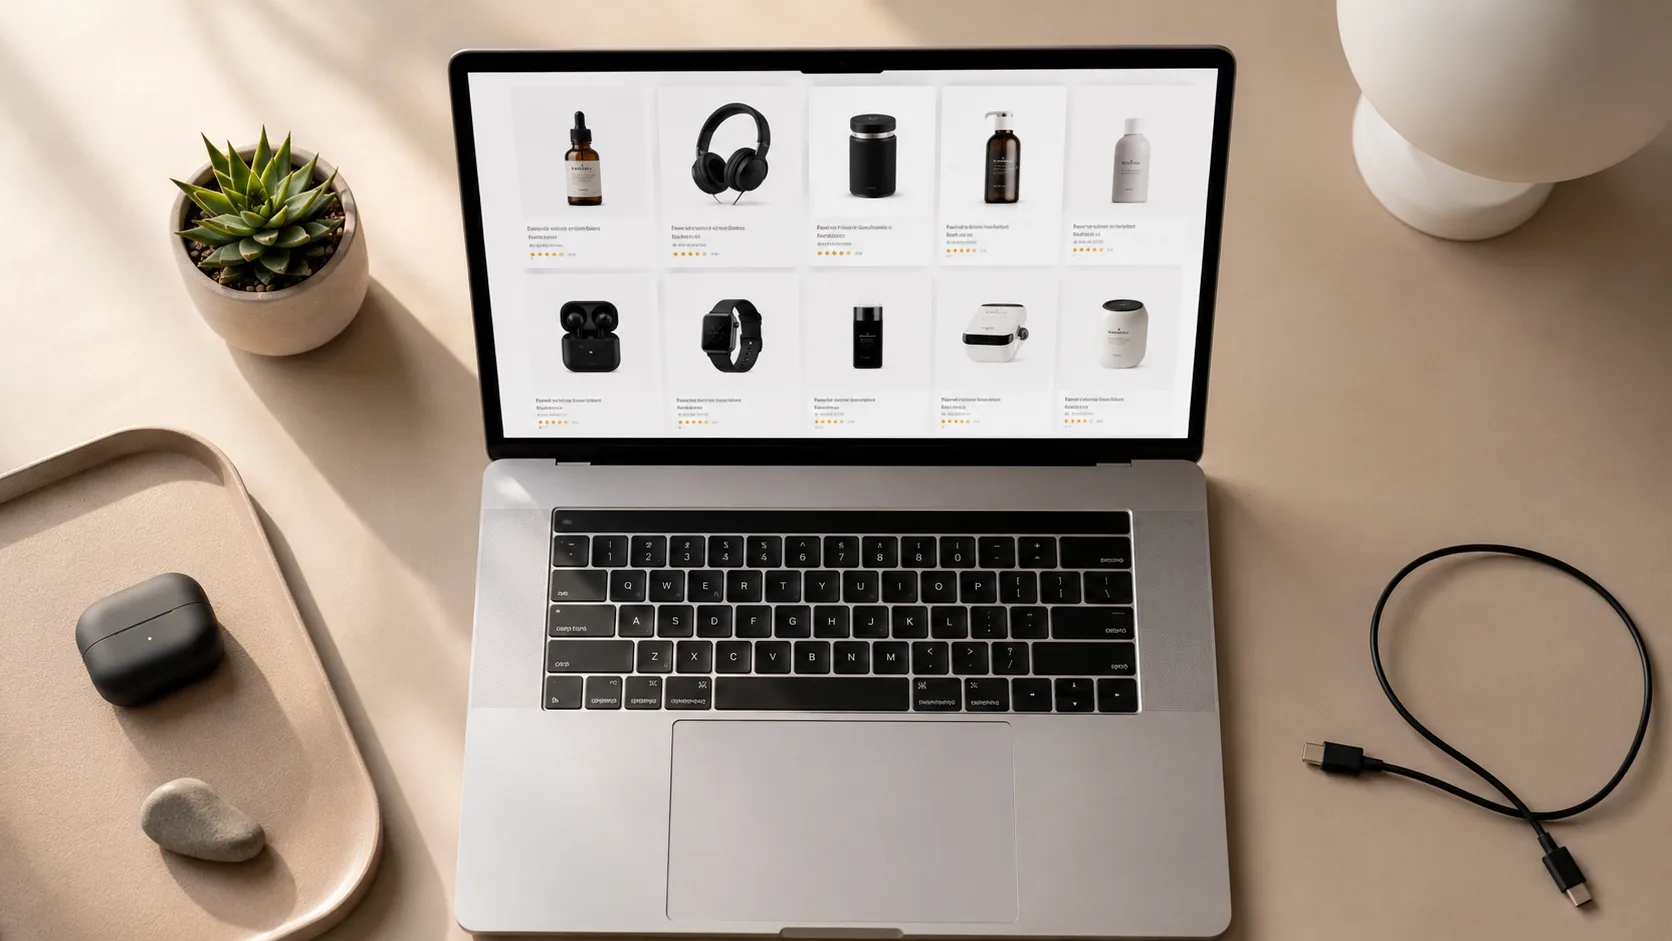
If you’re selling on Amazon FBA and you’ve been paying $50–$200 per product photoshoot, this guide will probably annoy you. Because over the past few months, AI image generation has crossed the line where it can produce listing-quality product photos at a fraction of the cost — if you know the workflow.
This is a complete walkthrough of how to move a product line from traditional photography to an AI-driven workflow — the playbook I put together while building batch tooling for Grok Imagine and studying how FBA sellers actually run image generation. It covers tool selection, prompt templates, batch generation, post-processing, and Listing integration. Done right, the software runs under $35/month total, and the time per Listing drops from the 2–3 days a photoshoot cycle takes to roughly 90 minutes of hands-on work.
This is meant to be the long-form reference — not a quick tip. Read the relevant sections; skip the rest.
Why This Matters in 2026
Traditional Amazon product photography has three structural problems:
1. Cost compounds with SKU count. If you have 30 SKUs and you want fresh hero images for each, $50 × 30 = $1,500 just to get baseline product photos. Add lifestyle shots (a model holding the product, the product in context, etc.) and you’re easily at $3,000–$5,000.
2. Iteration is slow. Want to test 5 different hero image styles for A/B optimization? That’s 5 photoshoots. Want to localize for Amazon DE vs. Amazon JP? More photoshoots.
3. Variations explode the budget. Selling the same product in 8 colors? Most photographers charge per color variant. Even if they don’t, you’re shipping 8 sample units.
AI image generation collapses all three. With the right setup:
- $4.90/month SaaS + the cost of Grok Imagine Pro (~$30/mo) = ~$35/month total
- 30 SKUs × 10 image variants each = 300 images, generated in under 4 hours
- Iteration is free. Want 5 hero styles? Generate all 5 in one batch.
- Variations are trivial. Same prompt, different color descriptor.
The catch (and there is one) is that the workflow is more involved than “type prompt, get image.” If you skip the workflow you’ll end up with images that look slightly off, won’t pass Amazon’s image policy, or won’t actually convert.
This guide is the workflow.
The AI Image Generation Landscape (Briefly)
There are roughly five categories of AI image tools relevant to Amazon sellers right now:
Closed proprietary models (Midjourney, DALL-E, Sora)
Highest visual fidelity. Best for hero images and lifestyle shots. Downside: batch generation is awkward (Midjourney has Discord-based batching, DALL-E has UI limits, Sora is video-first). Pricing $20–$30/mo and up.
Open-source local models (Stable Diffusion, Flux)
Most flexibility, $0 inference cost after you have a GPU. Downside: requires a 12GB+ VRAM card, real setup time, and the prompt skills to compete with closed models. Skip if you don’t already enjoy GPU tinkering.
Web-based newcomers (Grok Imagine, Kling, Veo)
Strong batch potential, but raw UI lacks the workflow features most sellers need (queue persistence, auto-naming, retry on failure). They’ve improved fast in 2026 — Grok Imagine in particular generates Amazon-friendly product shots at notable speed and consistency.
Wrapper tools and extensions
These sit on top of the above and add batch/workflow features. Their stability varies wildly. (More on this below — it’s where most workflows actually live.)
Photography-specific platforms (CGI Studio, Pebblely)
Purpose-built for product shots. Tend to be more expensive ($50–$200/mo) and less flexible than general-purpose AI image tools. Worth it if you only need product shots and value polish over flexibility.
For this guide I’ll focus on Grok Imagine + batch tooling, because that’s the stack I’d point most sellers to after comparing the options. Your mileage may vary, and I cover comparison criteria in detail at amzfinder.com — AI Image Generation Tools for Amazon Sellers.
The 5-Step Workflow
Step 1 — Define Your Image Taxonomy
Before generating anything, write down the image types you actually need per SKU. For most Amazon Listings this is:
- Main image (white background, product centered, no text overlay) — required by Amazon’s image policy
- Lifestyle hero (product in use, contextual setting)
- Detail shot (close-up of key feature)
- Scale reference (product next to common object)
- Infographic shot (product + simple callouts) — can be added later
- Variation renders (one per color/size variant)
Skipping this step is the #1 reason AI image workflows fail. You’ll generate 50 cool-looking shots and realize none of them pass Amazon’s main image policy (which requires pure white background, no props, no text). Decide the taxonomy first, generate to it.
A typical small electronics SKU needs ~6 image types × 1–3 variants = 6–18 images. A larger product line with 8 colors might need 50+ images per SKU. This is where batch generation stops being optional.
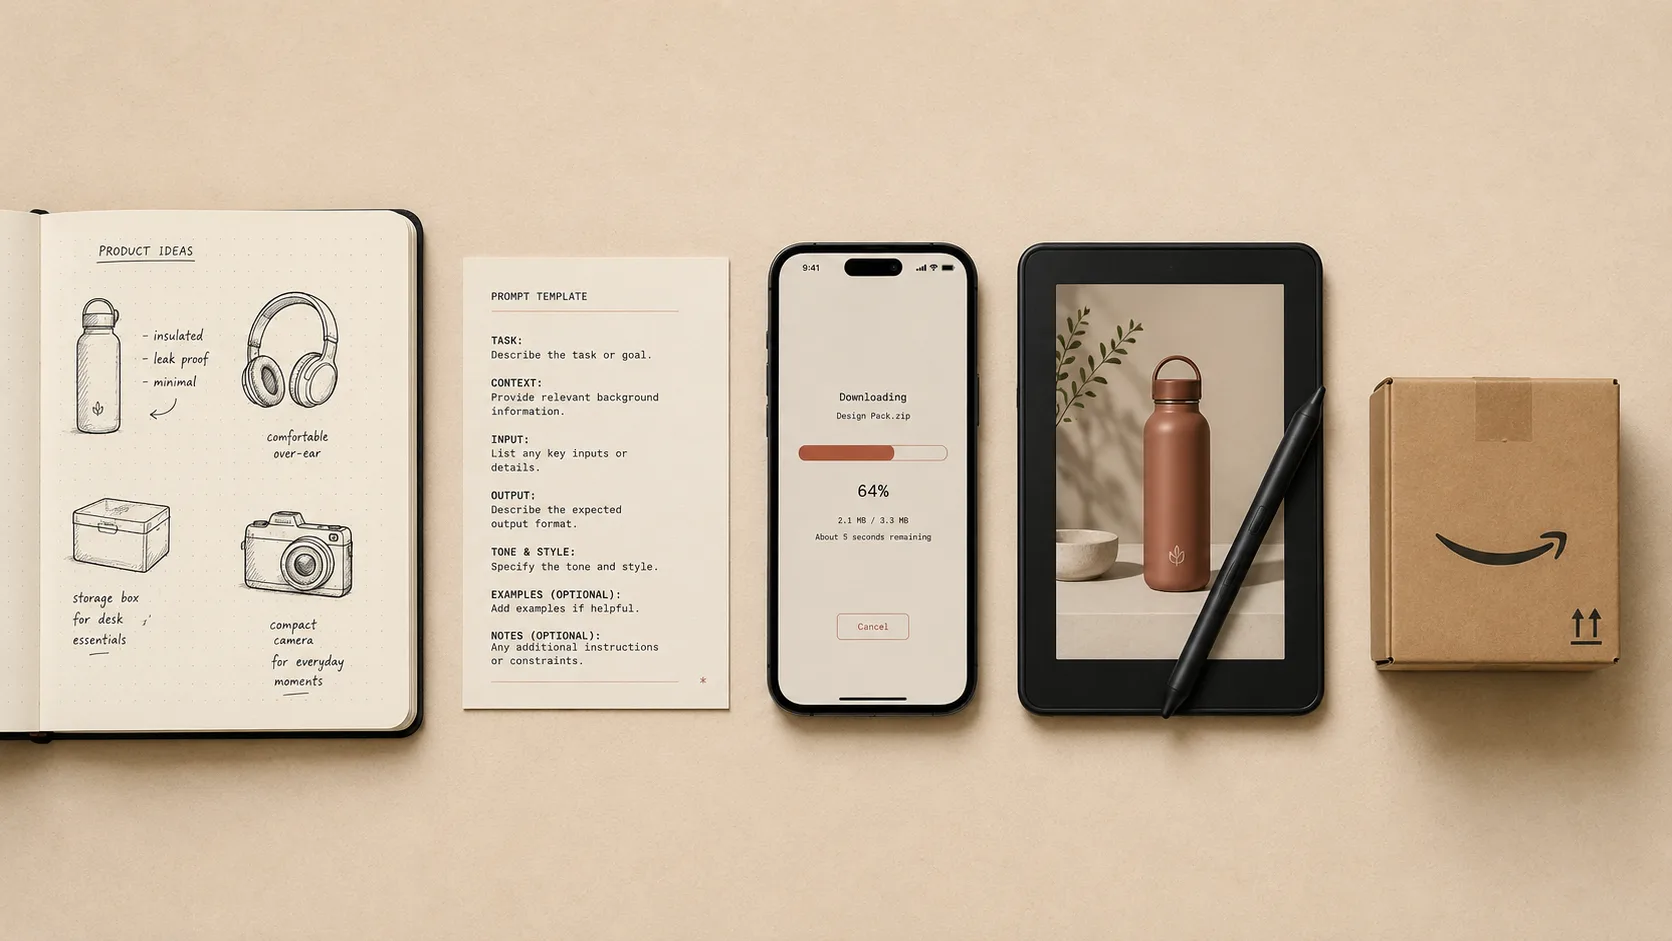
Step 2 — Build Your Prompt Template Library
This is the unglamorous part of the workflow that determines whether your images look like product photos or like AI-generated art.
Here’s a template structure that holds up across categories:
{PRODUCT_DESCRIPTION}, {ANGLE}, {LIGHTING}, {BACKGROUND}, {STYLE}, {TECHNICAL}
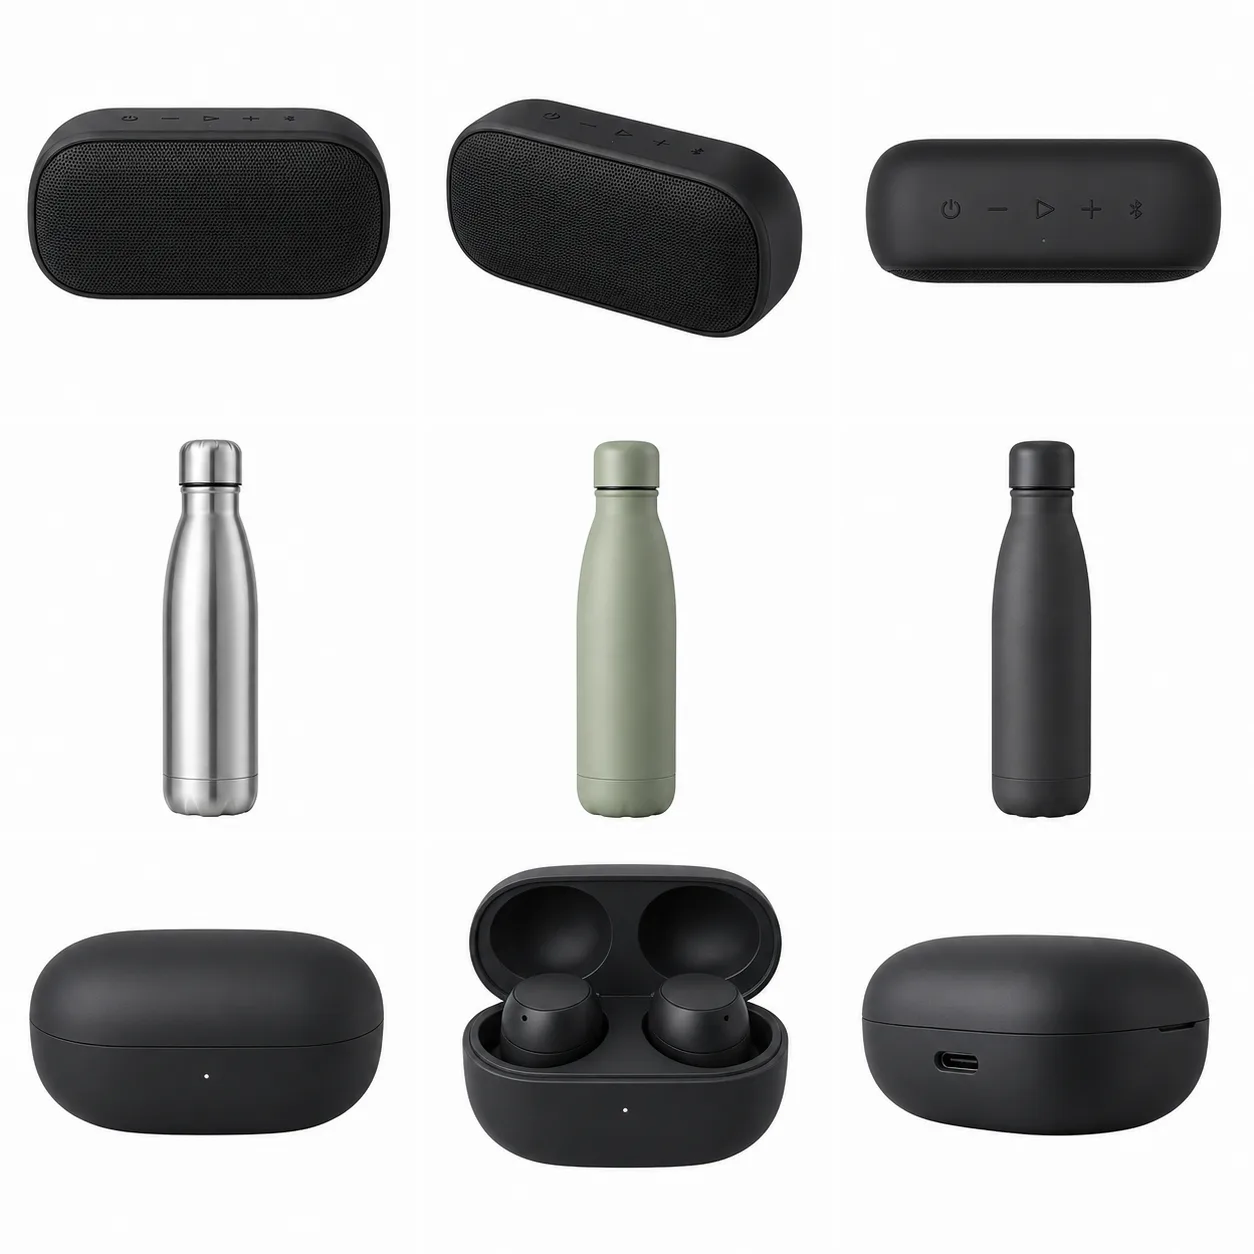
A real example for a Bluetooth speaker:
Compact wireless Bluetooth speaker in matte black finish with subtle fabric
grille, 3/4 angle product shot, soft studio lighting from upper left, pure
white background, commercial photography style, sharp focus, no shadows,
no props, 4k resolution
The key prompt elements for Amazon-compliant images:
- Always specify pure white background for main images (Amazon requires this)
- Always say no props, no text (Amazon image policy excludes these from main image)
- Always specify angle (“3/4 angle”, “front view”, “top-down”) — vague angles produce inconsistent batches
- Add “commercial photography” or “product photography” to push toward Amazon-friendly aesthetic vs. art-style outputs
- Include “sharp focus” and “4k resolution” — quality hints actually help most modern models
Keep about 30 templates in a single Markdown file, one per product category. When you start a new SKU, copy the closest template and adjust the product description. This is faster than writing prompts from scratch and produces more consistent batches.
Step 3 — Batch Generation
This is where most sellers give up on AI workflows, because doing it manually is painful: open Grok Imagine, paste prompt 1, wait, download, rename file, paste prompt 2, wait, download, rename, paste prompt 3 — by prompt 15 you’re ready to throw your laptop out the window.
A typical 18-image batch (6 image types × 3 SKUs) takes about 45 minutes if you babysit it. About 8 minutes if you queue it up properly and step away.
What “properly” means: you need a tool that handles four things batch generation always exposes:
Queue persistence. If your tab refreshes mid-batch (or worse, if you hit Grok’s rate limit halfway through), the tool should not lose the queue. You should be able to come back, see which prompts completed, and resume.
Auto-archive with prompt-matched filenames. The default filenames from any AI image tool are
image_001.png,image_002.pngand so on. After 30 batches this is impossible to navigate. Your tool should rename downloads to match the prompt — something likebluetooth_speaker_main_white_bg.png.Rate-limit handling. Grok’s “Super” tier hits rate limits around 60–80 prompts in a batch. You need exponential backoff and retry, otherwise long batches just die in the middle and you have to figure out what completed.
Frame-to-video stability (if you’re doing video listings, which Amazon increasingly supports). Grok’s Frame-to-Video has known bugs around auto-switching to image mode mid-batch and looping on the first frame — your tool should detect and route around these.
If you want to build this yourself, expect about a weekend of Tampermonkey or browser extension work, plus ongoing maintenance every time Grok ships a UI update (which is every 1–3 weeks). I tried this route and burned through about 20 hours over 6 weeks just on UI maintenance before I gave up and built a more robust tool (I cover the tool comparison in the amzfinder review below).
Working stack (what this guide recommends):
- Grok Imagine Super ($30/mo) — image and video generation
- grok-automation.com ($4.90/mo) — Chrome extension + backend for queue persistence, auto-archive, rate-limit retry, Grok UI tracking
- Together this runs about $35/mo for the AI image side
What this combination is built to do for an 18-image batch: paste 18 prompts, click Run, walk away, come back to a folder of properly named files. The whole point of the queue + retry layer is that a mid-batch rate limit or tab refresh shouldn’t cost you the run. Honest caveat: I’m still instrumenting per-prompt success rates, so I won’t quote a hard failure-rate number I can’t back with data yet. The failure mode it’s designed against is the 15–25% of prompts that casual, un-retried batches lose to rate limits and UI glitches — a range cited across the category, not a measured benchmark for this tool.
Other batch tools exist — see the amzfinder.com workflow stack comparison for an apples-to-apples scorecard. I’m biased toward grok-automation because I built it, so don’t take my word as gospel — the amzfinder review has a more neutral comparison.
Step 4 — Post-Processing (the Part Nobody Talks About)
Raw AI image output is rarely Amazon-ready. You’ll need to do at least three things to most images:
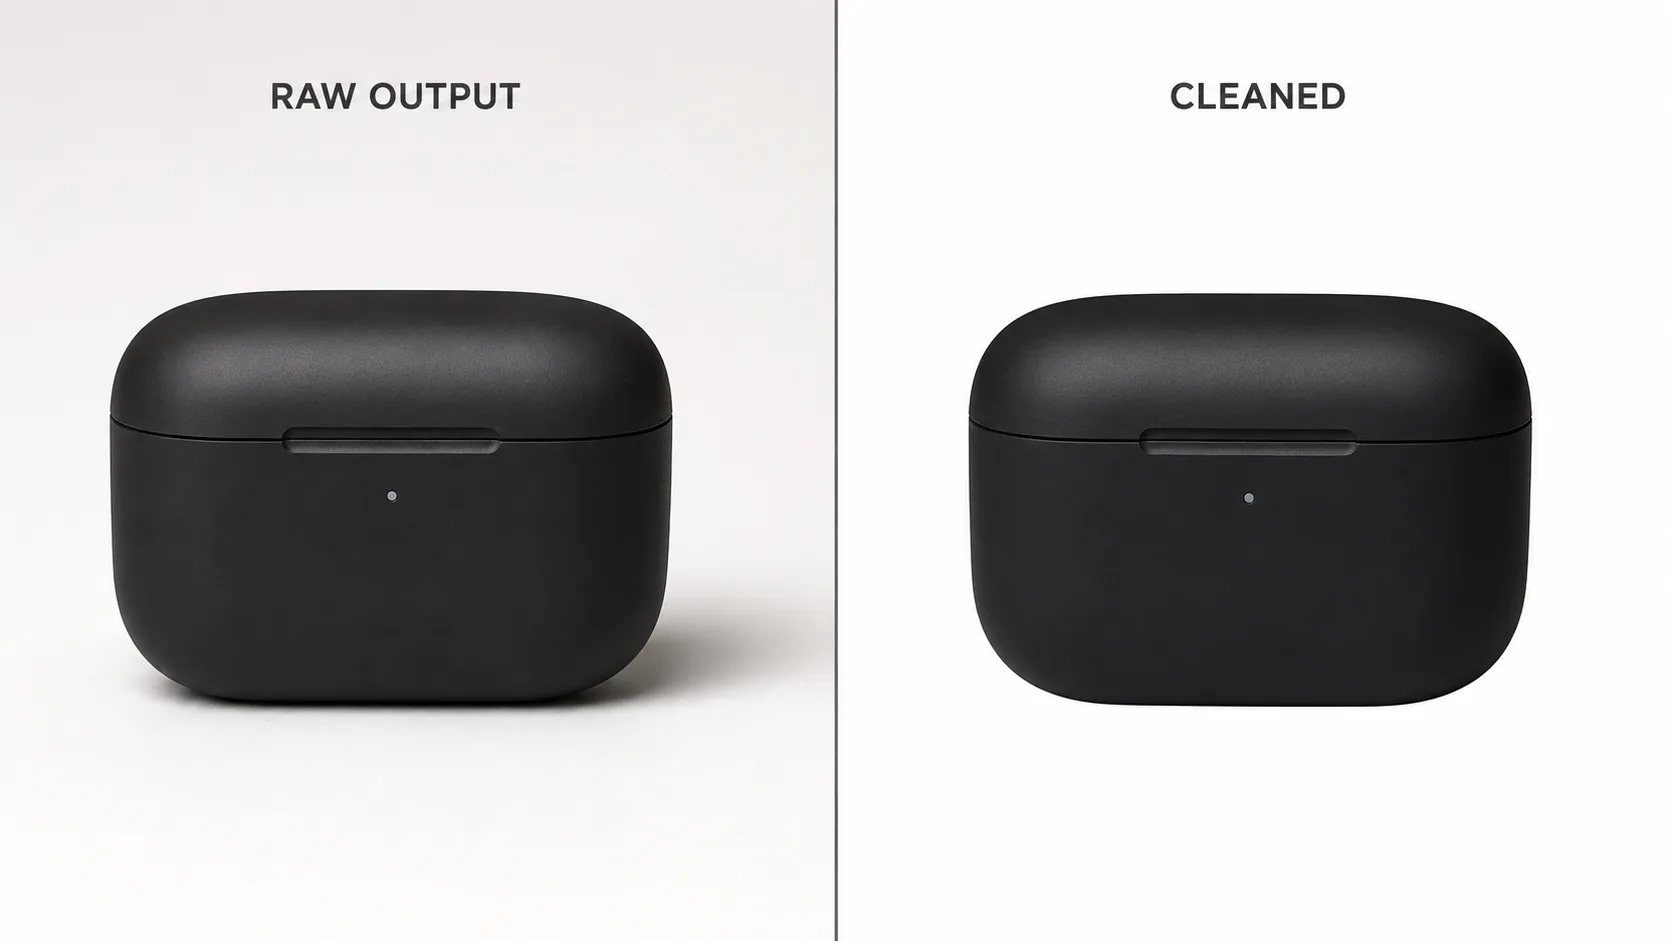
4a. Background cleanup. Even when you prompt for “pure white background”, AI models produce subtle gradients, off-white shadows, or stray pixels. Amazon’s image policy is strict about main image backgrounds. Run every main image through:
- Photopea (free, browser-based, Photoshop-like) — manual touch-up
- Remove.bg (free for low res, paid for high res) — automated removal
- Photoroom (one-click product photo cleanup) — good for batch
For high-volume sellers, Pebblely or Pixelcut are purpose-built for this and worth the $20/mo. At lower volume, Photopea + manual cleanup does the job without another subscription.
4b. Resolution check. Amazon’s image guidelines recommend 1600×1600 minimum for zoom support. Most AI tools default to 1024×1024 or lower. You either need to generate at higher resolution (slower, more expensive) or upscale afterward.
Topaz Photo AI is the paid option for upscaling, but free alternatives like Upscayl work for most product shots. The key is consistency — if your batch is mixed resolutions, the Listing looks inconsistent.
4c. Lifestyle shot integration. If you’re doing lifestyle shots (product being used by a person), you’ll often need to composite — generating the person and the product separately, then merging. The reason: AI models often get the product almost right but not exactly right, and Amazon shoppers notice. Better to generate the scene without the product, then composite the actual product photo (or a clean AI render) on top.
This is where the workflow gets opinionated. Some sellers go all-AI all the way through. The more defensible approach is a hybrid — AI for the scene/background, real (or carefully edited) product for the actual SKU — which sidesteps the “uncanny product” problem and reduces Amazon main-image policy risk.
Step 5 — Listing Integration and A/B Testing
Once you have your image set, the workflow before going live:
- Verify Amazon policy compliance. Main image: pure white, no props, no text, product fills 85% of frame. Variant images: can have lifestyle context. Read Amazon’s image guidelines once, then check every batch.
- Run a Listing image A/B test. Amazon doesn’t have native image A/B testing, but you can use PickFu ($75/poll, ~50 respondents) or the slower approach of swapping main images for a week and tracking conversion delta.
- Localize. If you sell in multiple Amazon regions, the same SKU should have region-specific lifestyle shots. A product photographed in a Western kitchen converts differently in Amazon JP. The AI workflow makes this trivially cheap — just adjust the prompt’s setting/style.
For ongoing iteration, the AI workflow lets you test 5–10 hero images per SKU per quarter. Traditional photography would let you test maybe 1–2. The compounding A/B testing advantage over a year is significant.
Worked Example: 4-SKU Launch (Illustrative)
To make the math concrete, here’s an illustrative worked example using realistic 2026 numbers — a 4-SKU portable USB-C charger line (20W, 45W, 65W, 100W). The figures below are modeled to show how the workflow pencils out, not a report from one specific launch.
Inputs:
- 4 SKUs × 7 image types = 28 base images
- 4 SKUs × 3 color variants = 12 variation renders
- Total: 40 images
Workflow:
- Day 1 morning (90 minutes): wrote 7 prompt templates, one per image type. Tested each template on the 20W SKU and refined.
- Day 1 afternoon (30 minutes setup + 4 hours batch): queued the full 40-image batch in grok-automation and stepped away instead of babysitting each prompt. The handful that upstream rate limits dropped were a one-click re-run, not a redo of the whole batch.
- Day 2 (3 hours): post-processed all 40 — background cleanup, upscale to 2400×2400, composite the lifestyle shots.
- Day 3 (1 hour): uploaded to Amazon, verified policy compliance.
Cost:
- Grok Imagine Super (1 month): $30
- grok-automation (1 month): $4.90
- Photopea + Upscayl (post-processing): $0
- PickFu image A/B testing (1 poll per SKU = 4 polls): $300
- Total: ~$335 for 4 complete Listings, 40 images, A/B validated
Comparison to traditional:
- 4 product photoshoots at $150 each = $600
- 4 lifestyle shoots at $200 each = $800
- Sample units shipped to photographer: ~$200 in inventory and shipping
- Turnaround: ~3 weeks vs. 3 days
- Traditional total: ~$1,600, 3 weeks
The AI workflow was about 80% cheaper and 7× faster. Image quality was comparable to the traditional photoshoots, with the AI workflow winning on variation breadth (at 3 color variants per SKU, traditional would have required roughly 3× the budget for the same coverage).
Conversion impact:
Conversion is the metric that actually matters, and it’s the one to verify yourself rather than take on faith. There’s no public benchmark showing that well-executed AI main images convert differently from traditional photography — so the honest move is to A/B test your own main image (PickFu, or Amazon’s Manage Your Experiments) before committing a whole catalog. Don’t assume a lift; measure it. The plausible upside is on lifestyle/scene shots, where AI lets you iterate far faster than a photoshoot cycle.
Common Pitfalls (and How to Dodge Them)
Pitfall 1: Main image fails Amazon policy review.
Amazon’s automated image policy checker flags AI-generated main images that have subtle backgrounds, slight color cast, or unclear product boundaries. Expect roughly 1 in 8 AI-generated main images to get flagged on initial upload. The fix is always background cleanup + a manual edge cleanup pass in Photopea. Budget 5 minutes per flagged image.
Pitfall 2: Listings look “uncanny.”
This happens when the AI gets the product 95% right but a fine detail is wrong — a logo placement slightly off, a button shape subtly different, a material texture not quite matching the real product. Amazon shoppers notice and trust drops. Fix: hybrid workflow (AI for background/scene, real product for the SKU itself).
Pitfall 3: Batches dying mid-run.
Without proper retry/persistence, you’ll lose 15–25% of prompts to rate limits, UI glitches, or Grok updates. This is the single biggest reason sellers abandon AI workflows after one bad batch. Either use a tool with proper retry logic, or budget significant babysitting time.
Pitfall 4: Prompt drift across batches.
If you don’t lock down prompt templates, your batches will drift over time — slightly different lighting, slightly different angles. The Listing visual consistency degrades subtly. Version your prompt files like code. Use a date suffix or git.
Pitfall 5: Over-relying on AI for compliance-sensitive products.
If you sell in regulated categories (supplements, electronics with FCC marks, baby/toy items with safety labels), AI-generated images will often hallucinate compliance markings that don’t actually exist on your product. Or worse, leave them out. For these products, AI is fine for lifestyle shots but main images should be real photography of the actual unit shipping to customers.
The 2026 Workflow Stack This Guide Recommends
Putting it all together, here’s the recommended stack for a catalog in the dozens-of-SKUs range:
Image generation:
- Grok Imagine Super ($30/mo) — primary generator
- grok-automation.com ($4.90/mo) — batch tooling
Post-processing:
- Photopea (free) — manual cleanup
- Upscayl (free, local) — upscaling
- PickFu ($75 per A/B test) — image conversion testing
Listing management:
- Helium 10 or Jungle Scout ($30–$80/mo) — keyword research feeding into prompts
- amzbase.com (free) — competitor product photo research
- amzfinder.com (free) — tool stack updates and reviews
Optional / situational:
- Sora or Veo ($20/mo) — if you need product video for A+ Content
- Photoroom ($20/mo) — if your background cleanup volume is high
Total monthly software cost: ~$70/month for the core stack. Per-Listing cost: roughly $5–$10 in software amortization plus 90 minutes of your time.
Compare this to the $400–$1,000 per Listing range for traditional product photography and the math is hard to argue with — for the right kinds of products.
When This Workflow Doesn’t Work
To be fair to traditional photography, AI image generation isn’t always the right call:
- Luxury or premium-positioned products where authenticity perception matters. AI images can subtly read as “stock” to discerning buyers.
- Apparel and fashion where fit, drape, and texture matter, and where AI still struggles with realistic human models in product context.
- Food and beverage where appetite appeal is everything and AI often produces “almost food” that triggers uncanny valley.
- Highly technical products (industrial equipment, medical devices) where the buyer needs to see the actual specifications and details.
For these categories, hybrid workflows (real photography for hero, AI for scene variations) generally outperform either pure approach.
Quick Start Checklist
If you’re going to try this workflow this week:
- Pick 1 SKU to start with (don’t try all your SKUs at once)
- Write down the 6 image types you need (Step 1)
- Pick a starting prompt template — there’s a free template library in the resources section below
- Sign up for Grok Imagine Super
- Set up batch tooling (grok-automation has a free first batch — link below)
- Run your first 6-image batch end to end
- Time the workflow honestly. The first batch will be slow because you’re learning. Subsequent batches will be 3–5× faster.
- Cross-check Amazon image policy before uploading
- Run one PickFu A/B test on the main image
If the first batch goes well, scale to your full SKU list. If it doesn’t, iterate on prompts before scaling — there’s a feedback loop you need to find for your specific product category.
Resources
- Tool stack comparison with 8-dimension scoring: amzfinder.com — AI Image Generation Tools for Amazon Sellers
- Batch tooling with free first batch: grok-automation.com
- Amazon image policy reference: Amazon Seller Central
FAQ
Q: Is this allowed by Amazon?
Yes. Amazon’s image policy is about the visual properties of the image (background, props, text, percentage filled, etc.), not about how the image was created. AI-generated images that comply with the visual policy are fine. That said, the policy explicitly excludes images that misrepresent the product, so don’t use AI to add features your product doesn’t have.
Q: Will Amazon’s algorithm penalize AI images?
There’s no public evidence that Amazon’s search ranking distinguishes between AI and traditional product images. Conversion rate is the relevant signal, and well-executed AI images can convert competitively with traditional photography — though you should confirm it on your own listings rather than take that on faith.
Q: What about Trademark / copyright issues?
AI image generation can occasionally produce images that look similar to existing branded content. The risk is low for product photography (most products are generic enough) but real. Two safeguards: don’t use brand names in prompts unless it’s your brand, and run a reverse image search on any AI image before going live.
Q: How long does the workflow take to learn?
Realistically: 1 week to comfort, 1 month to mastery. The first 5–10 batches are slow because you’re learning prompt templates and post-processing. By batch 30 you’ll have your own template library and the per-Listing time drops to under 90 minutes.
Q: What’s the catch?
The catch is that AI image generation tools change rapidly — Grok ships UI updates every few weeks, models get replaced, pricing shifts. The workflow described above is the 2026 Q2 stack and will probably need updating by Q4. That’s why we keep a current stack comparison at amzfinder.com and update it monthly.
If this guide saved you a photoshoot, the free first-batch trial at grok-automation.com is the easiest way to confirm the workflow on your own SKU before committing to anything. No subscription required to try.